
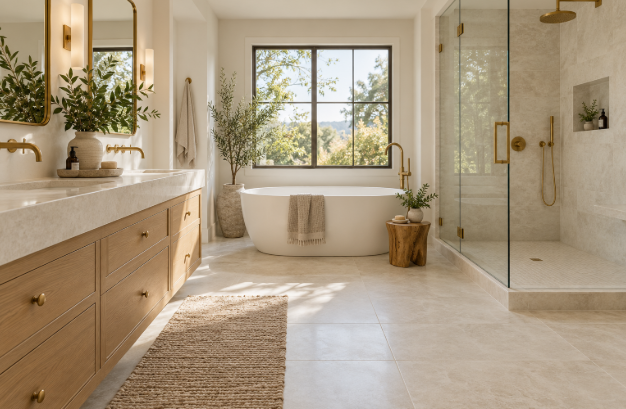
A bathroom remodel can feel like a long list of decisions, but bathroom and tiling choices become easier when you start with how the room needs to work. The right tile should stand up to water, daily cleaning, and slippery feet while making the space feel comfortable and finished. You do not need to cover every surface in a statement pattern. A thoughtful mix of durable floor tile, well-planned shower walls, and a restrained color palette can give a bathroom lasting style without making the project harder to maintain.
This guide covers materials, sizes, colors, layouts, grout, waterproofing, costs, and care. It helps homeowners compare options and avoid choices that disappoint after installation. A good bathroom and tiling plan begins with the room’s needs.
Start with the room and the way you use it
Before browsing samples, write down what is not working in the current bathroom. Is the floor hard to clean? Does the shower feel cramped? Are there loose tiles, stained grout, or signs of moisture? Is the room shared by children, guests, or someone who needs extra support? A clear list keeps the project focused on everyday needs, not just a style photograph. Good bathroom and tiling planning starts here.
Measure floors, shower walls, and backsplashes separately. Sketch doors, fixtures, niches, and drains. Measurements help estimate quantities and show where cuts will land. Buy extra for cuts and future repairs; ask the installer to calculate the amount for your pattern.
Set a budget before choosing materials. Include tile, waterproofing, grout, trim, demolition, disposal, plumbing, and labor. Decorative borders can raise installation time. A simple field tile with one accent is often easier to maintain and less costly to install.
Choose the right tile material
Porcelain
Porcelain is popular because it is dense, durable, and available in many finishes. It can imitate stone, concrete, or wood with less upkeep than some natural materials. Check that the product is rated for its location; wall tile is not automatically suitable for a wet floor. Compare bathroom and tiling products by their ratings.
For bathroom and tiling decisions, check the manufacturer’s guidance on floor use, wet areas, slip resistance, and care. Matte or textured finishes may offer better footing than polished ones, though texture can take more scrubbing.
Ceramic
Ceramic is often economical for walls and light-use floors. Glazed ceramic is easy to wipe and comes in many shapes. Check the rating before using it on floors, since some products are fragile under heavy traffic.
Natural stone
Marble, limestone, slate, and travertine have natural variation, but usually need more care. Some stones need sealing, and acidic cleaners can damage them. Ask about safe cleaners and view several pieces because color and veining vary.
Glass and mosaics
Glass can brighten a niche or backsplash. Mosaics work well on sloped shower floors and add detail, but need careful alignment. Use them in a focused area if the room already has strong patterns.
Select tile for each surface
Floor tile should be sturdy and suited to wet-foot traffic. Large tiles look calmer but need a flat floor. Small mosaics are easier to slope toward a shower drain. Shape and texture matter as much as color.
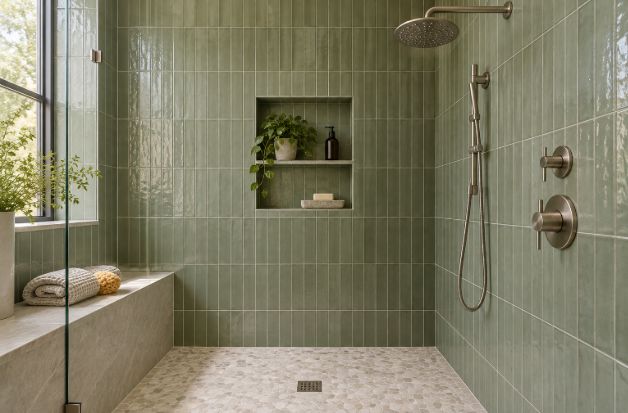
Shower and tub walls need a system intended for wet areas. Tile is only the visible finish; the wall behind it must manage water. Ask the contractor to explain the waterproof membrane or approved backer system. Choose a wall tile that is easy to clean.
A vanity backsplash can introduce color without a full feature wall. Simple bathroom and tiling combinations often age well. Choose an easy-to-clean finish and coordinate it with the counter, cabinet, fixtures, and mirror.
Pick a size, shape, and layout
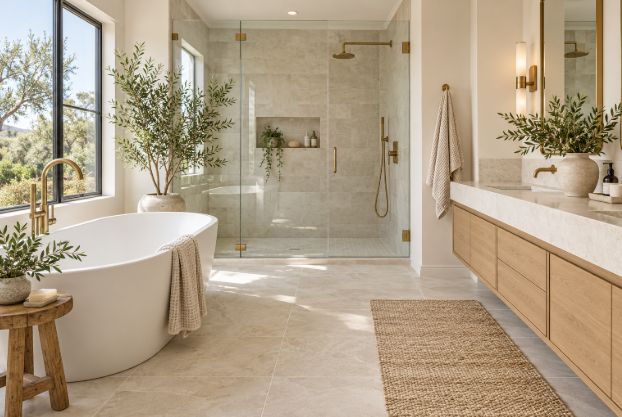
Tile scale affects the room’s mood. Large pieces look calm; smaller ones add grout lines and texture. Subway tile can be installed in running-bond, stacked, herringbone, or vertical patterns. Choose a layout that suits the room and budget. This makes bathroom and tiling work easier to price.
Ask for a dry layout before the installer begins. This means arranging tiles without adhesive to check the pattern, color variation, and cuts. A centered layout may look balanced, but it can leave narrow slivers at a doorway or along a tub. Sometimes shifting the starting line slightly creates better cuts and a cleaner finish. Plan how the wall tile meets corners, niches, windows, and trim before installation day.
Patterned tile can shine on a small floor or behind a vanity. Keep nearby surfaces simple. If mixing styles, compare undertones in the bathroom light; warm white and cool gray may clash.
Use color and finish to shape the space
Light colors can open up a compact bathroom. Cream, pale gray, soft green, and beige add warmth; dark tile creates depth in a powder room or feature area. Balance darker colors with good lighting and lighter surfaces.
Check tile undertones. Warm beige suits oak and brass; cool grays pair with chrome or black. Take samples home and view them in different light, since store lighting can mislead.
Glossy finishes are easy to wipe on walls but can be slippery on floors. Matte finishes hide small marks, while rough textures may hold residue. Ask about the product’s intended use. Bathroom and tiling samples should be checked in your own light.
Do not overlook grout and trim
Grout color changes the look of a tile installation. A close match gives the surface a quieter, more continuous appearance. A contrasting color outlines each tile and emphasizes the pattern. Both approaches can work; decide based on the look you want and how much visual detail the room can handle. Very light grout may show stains sooner in a heavily used shower, while very dark grout can show mineral residue or dust.
Ask which grout suits the tile, joint width, and location. Grout does not waterproof a shower; corners and changes of plane usually need flexible sealant. Follow product instructions. Natural stone may need a compatible sealer.
Finish edges with matching bullnose pieces, metal trim, or a clean return into an adjacent surface. Exposed raw edges can make a project look unfinished and may be easier to chip. Decide on edge details before ordering so the required trim is available from the same product line or a compatible finish.
Waterproofing and installation deserve careful attention
A shower’s most important details are hidden. Water can pass through grout, so the wall and floor need a waterproofing system. The floor must slope to the drain. Plumbing changes, curbless showers, or structural work may require local permits or inspections.
Ask how installers prepare the surface, waterproof the shower, treat corners and niches, and check the floor slope. Get a written estimate for preparation, materials, demolition, disposal, tile setting, trim, and cleanup. Confirm permits and workmanship coverage.
Before work starts, agree on tile direction, grout color, edge finish, niche placement, and transitions. Keep spare tiles from the same lot for future repairs.
Keep the project within budget
Prices vary, and preparation can add substantially to the total. Removing tile, repairing a subfloor, leveling walls, moving plumbing, or building a niche take time. Intricate layouts may cost more. Compare itemized quotes.
To save money, keep plumbing in place, use a straightforward layout, and reserve decorative tile for a small area. A midrange porcelain can work for most surfaces. Order a reserve for cuts and repairs.
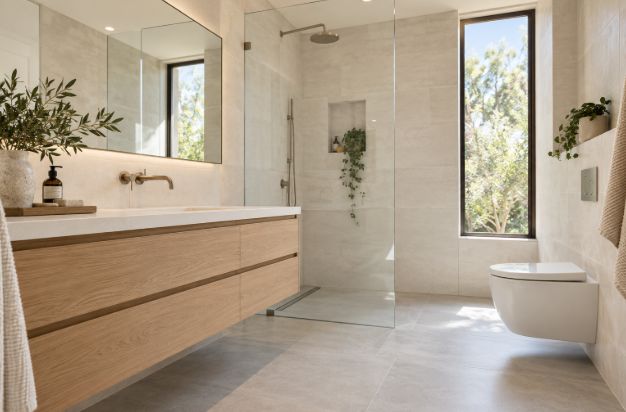
Make a small bathroom feel more open
In a compact bathroom, use one main floor tile and a related color on shower walls. A glass panel, floating vanity, large mirror, and good lighting reduce clutter. Plan cuts to avoid awkward slivers.
Limit bold pattern to the floor or one wall, then repeat its accent color in towels or hardware. Vertical tile can draw the eye upward; horizontal placement may make a narrow wall feel wider. Test with samples.
Think about safety and accessibility
Bathroom floors should provide dependable footing. Ask about slip-resistance guidance and wet-area suitability. Small shower mosaics create more grout joints, but the surface still needs to be stable and free of sharp height changes.
An accessible bathroom may include a low-threshold shower, handheld shower, blocking for future grab bars, and room to move. Coordinate drainage, waterproofing, and local requirements before ordering tile.
Care for tile after installation
Let grout and sealant cure as directed before using the shower. Run the exhaust fan, remove standing water, and use a cleaner approved for tile and grout. Acids can etch stone; abrasive pads may scratch finishes. Test unfamiliar cleaners in a hidden area.
Check corners and joints occasionally. Replace cracked sealant, and investigate loose tile, damp smells, or recurring grout cracks early.
Common mistakes to avoid
- Choosing floor tile based only on its color or online photograph.
- Assuming all tile is appropriate for floors, showers, or wet locations.
- Skipping a dry layout and discovering narrow cuts after installation begins.
- Treating grout as the waterproof layer behind a shower wall.
- Combining several strong patterns without a clear focal point.
- Forgetting edge trim, transitions, spare tile, or the cost of demolition.
- Using a cleaner that is not safe for the tile or grout.
A sample board and written plan help the homeowner, supplier, and installer stay aligned.
Bring the design together before ordering
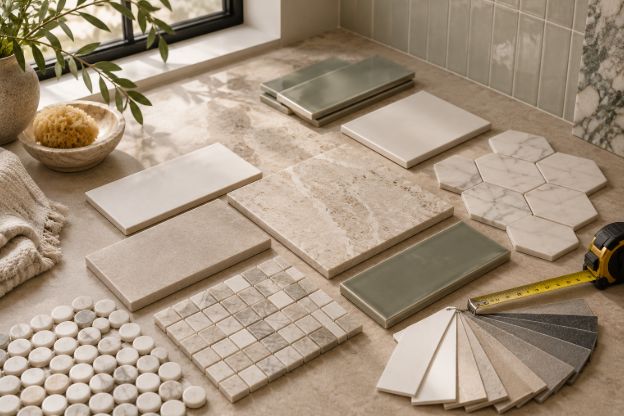
A bathroom usually feels finished when the tile, countertop, vanity, paint, lighting, and hardware share a few common qualities. That does not mean every surface has to match. Instead, choose one dominant material, one supporting material, and one accent. For example, pale stone-look porcelain can cover the floor, a simple white ceramic can line the shower, and a small green mosaic can appear inside the niche. Repeating the accent color in towels or a plant pot makes the choice feel intentional.
Make a small mood board with tile samples, a cabinet finish, a countertop sample, and a paint chip. Lay them together near a window and again under the bathroom light. If one sample suddenly looks pink, yellow, or blue beside the others, it may have an undertone that will be difficult to balance. Taking time to compare them is easier than changing course after boxes arrive.
A printed or digital layout can also help you judge scale. Place the tile pattern on a simple drawing of the room and mark fixtures. This is especially helpful for niches, benches, tub decks, and accent bands, where a grout line can fall in an awkward spot. Ask the installer whether the drawing matches the actual dimensions, since walls and floors are not always perfectly square. The best bathroom and tiling choices are clear to everyone before the first tile is set.
Plan ordering, delivery, and installation
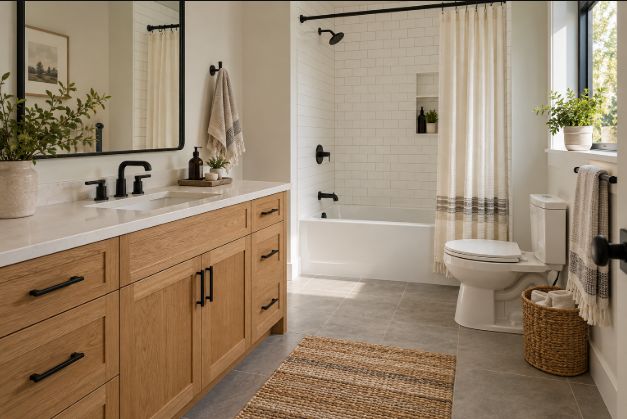
Once the tile is selected, confirm the product name, size, finish, color, and lot number on the order. Ask how long replenishment takes if a box arrives damaged or if the measured quantity changes. Inspect the delivery before the crew starts and keep packaging labels. Open a few boxes and mix pieces from different cartons; this helps spread natural shade variation across the room instead of creating visible blocks.
Coordinate the delivery with demolition and surface preparation. Tile should not be installed over an unstable floor, a wet substrate, or a wall that has not been prepared for the chosen waterproofing system. If the project includes a new shower, ask when it will be available for use and which curing periods must be respected. The schedule should account for demolition, repairs, waterproofing, tile setting, grouting, sealant, and fixture installation.
Keep product specifications, receipts, grout details, and contractor information together. Save spare tiles in a dry place for future repairs.
Design directions that work in many homes
A classic look pairs white or cream wall tile with a restrained grout color and a warmer floor. It suits many styles and gives you room to update paint and accessories later. A contemporary room may use larger porcelain slabs or concrete-look tile, then add warmth with wood cabinetry and softer lighting. For a more traditional space, marble-look surfaces, small mosaics, and polished metal can provide detail without covering every wall in ornament.
Nature-inspired colors are another flexible option. Sage, muted blue, clay, and sand can bring a little personality while staying calm. If you want a stronger color, use it on a vanity wall or shower niche rather than across every surface. In a guest bathroom or powder room, a bolder patterned floor can make a small footprint memorable, provided the walls and accessories stay simple.
Bring home samples, take photos in the room, and notice which materials still appeal after a few days. Thoughtful choices should also suit the way you clean and use the room. A bathroom is used daily, so comfort and easy care matter as much as the first impression.
Frequently asked questions
What is the best tile for a bathroom floor?
Porcelain is durable and comes in many finishes. Check that the product is approved for floor and wet conditions, and consider how it feels underfoot.
Is large tile a good choice for a small bathroom?
Yes. Large tile can look calm, but the floor must be flat and the layout should avoid awkward cuts. Smaller mosaics often work better on sloped shower floors.
Can I use the same tile on shower walls and floors?
Sometimes. Check that the product is rated for both locations; collections often offer coordinated wall and floor versions.
How do I choose grout color?
Match grout to the tile for a quieter look or contrast it to emphasize the pattern. View samples with the actual tile and consider cleaning habits.
Does bathroom tile need to be sealed?
Some grout and natural stone need sealing; many porcelain and glazed ceramic tiles do not. Follow product instructions. Sealing does not replace waterproofing.
How much extra tile should I buy?
It depends on layout and pattern. Ask the installer to calculate a reserve for cuts, breakage, and future repairs. Careful bathroom and tiling estimates reduce waste.
How long does a bathroom tiling project take?
It depends on demolition, repairs, waterproofing, pattern, and curing times. Ask for a schedule that includes preparation and drying.
Can I tile over existing bathroom tile?
Sometimes, if the old surface is sound and compatible. Added height can affect doors, drains, and transitions, so get an installer’s assessment first.
Conclusion
Successful bathroom and tiling decisions balance appearance with daily use. Choose products rated for each surface, check samples in your own lighting, and plan the layout before installation. Give waterproofing, floor slope, and workmanship as much attention as color. A practical material and clear plan can create a bathroom that feels personal and lasts.